
Connecting an AMS to the Printer
To connect the AMS system to the X1C, please follow the steps below:
|
Take the PTFE tube from inside the AMS unit, and connect it from the blue PTFE coupler on the machine to the filament buffer in the back. |
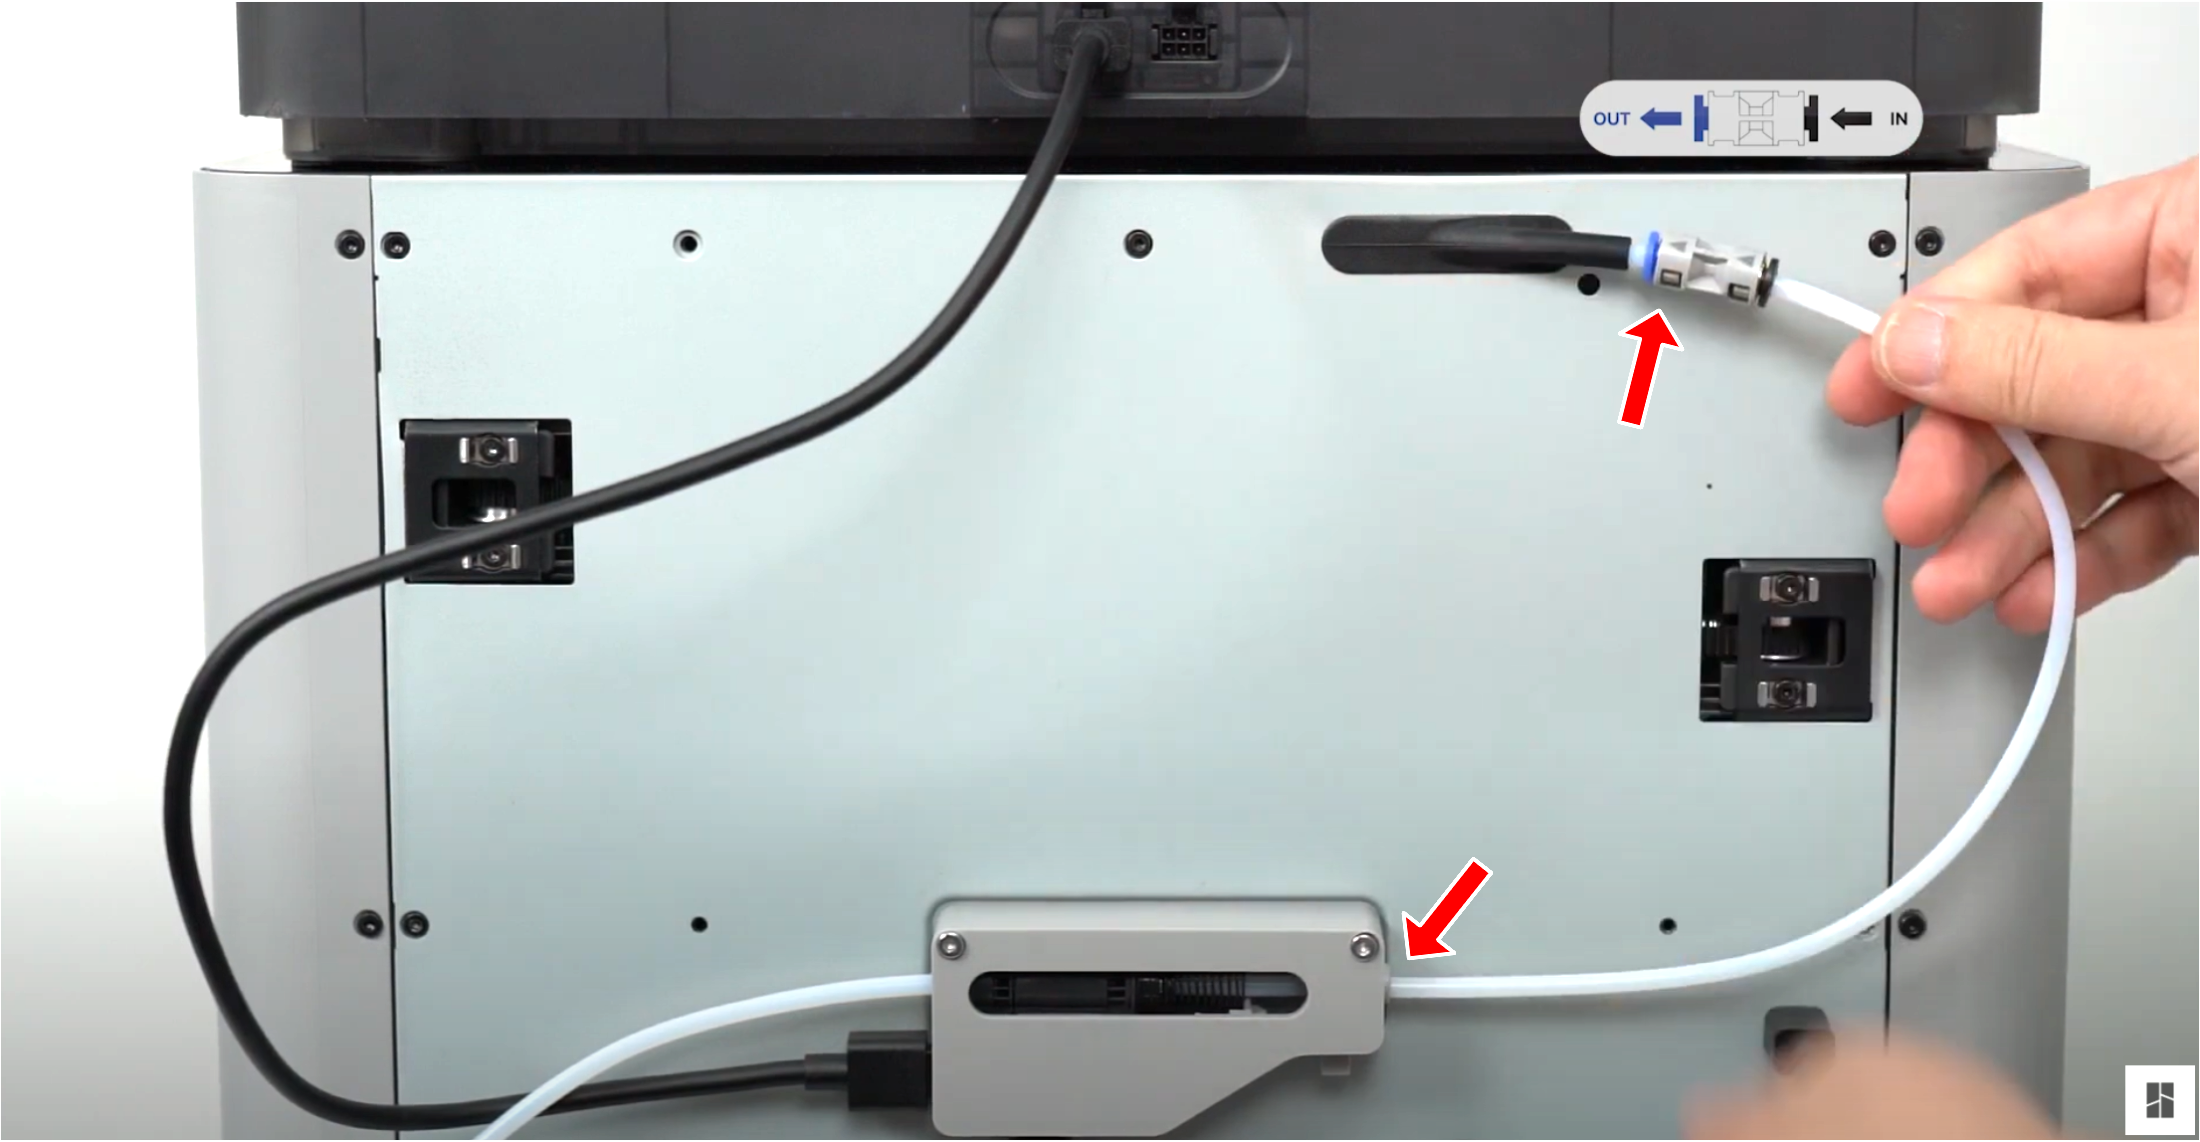 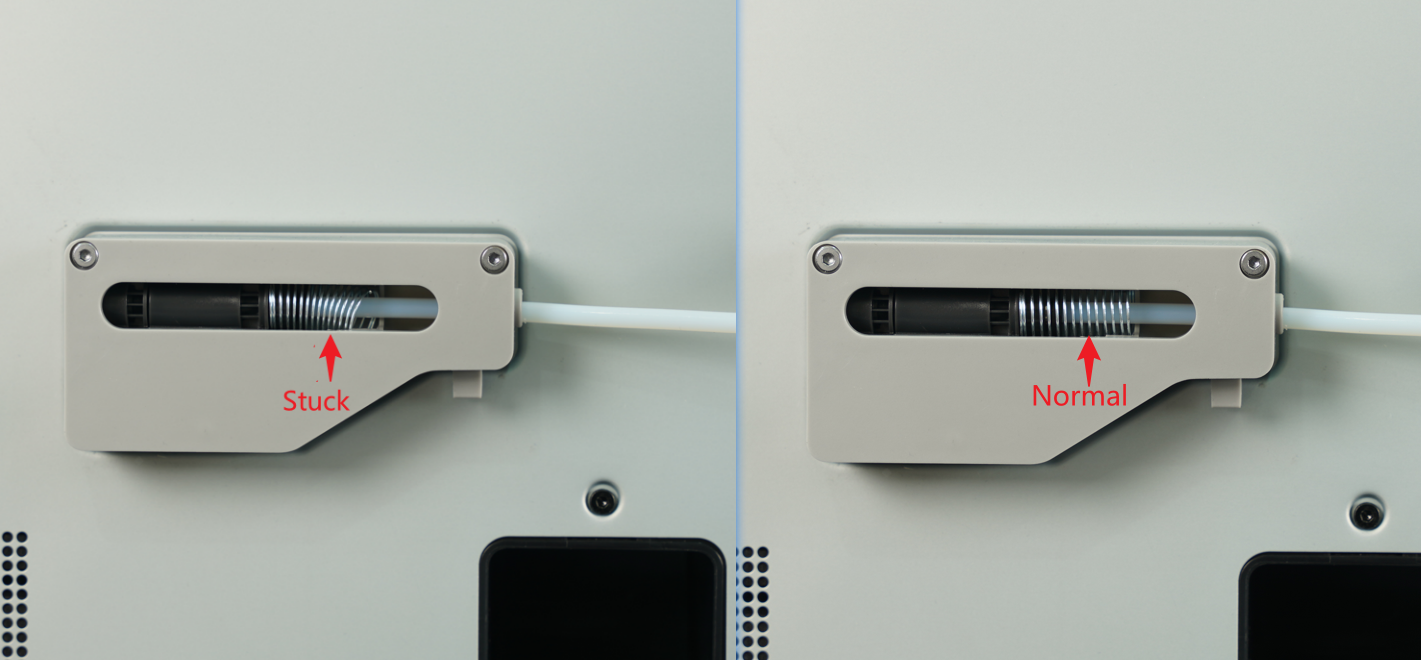
Make sure the spring of the buffer is not stuck |
|
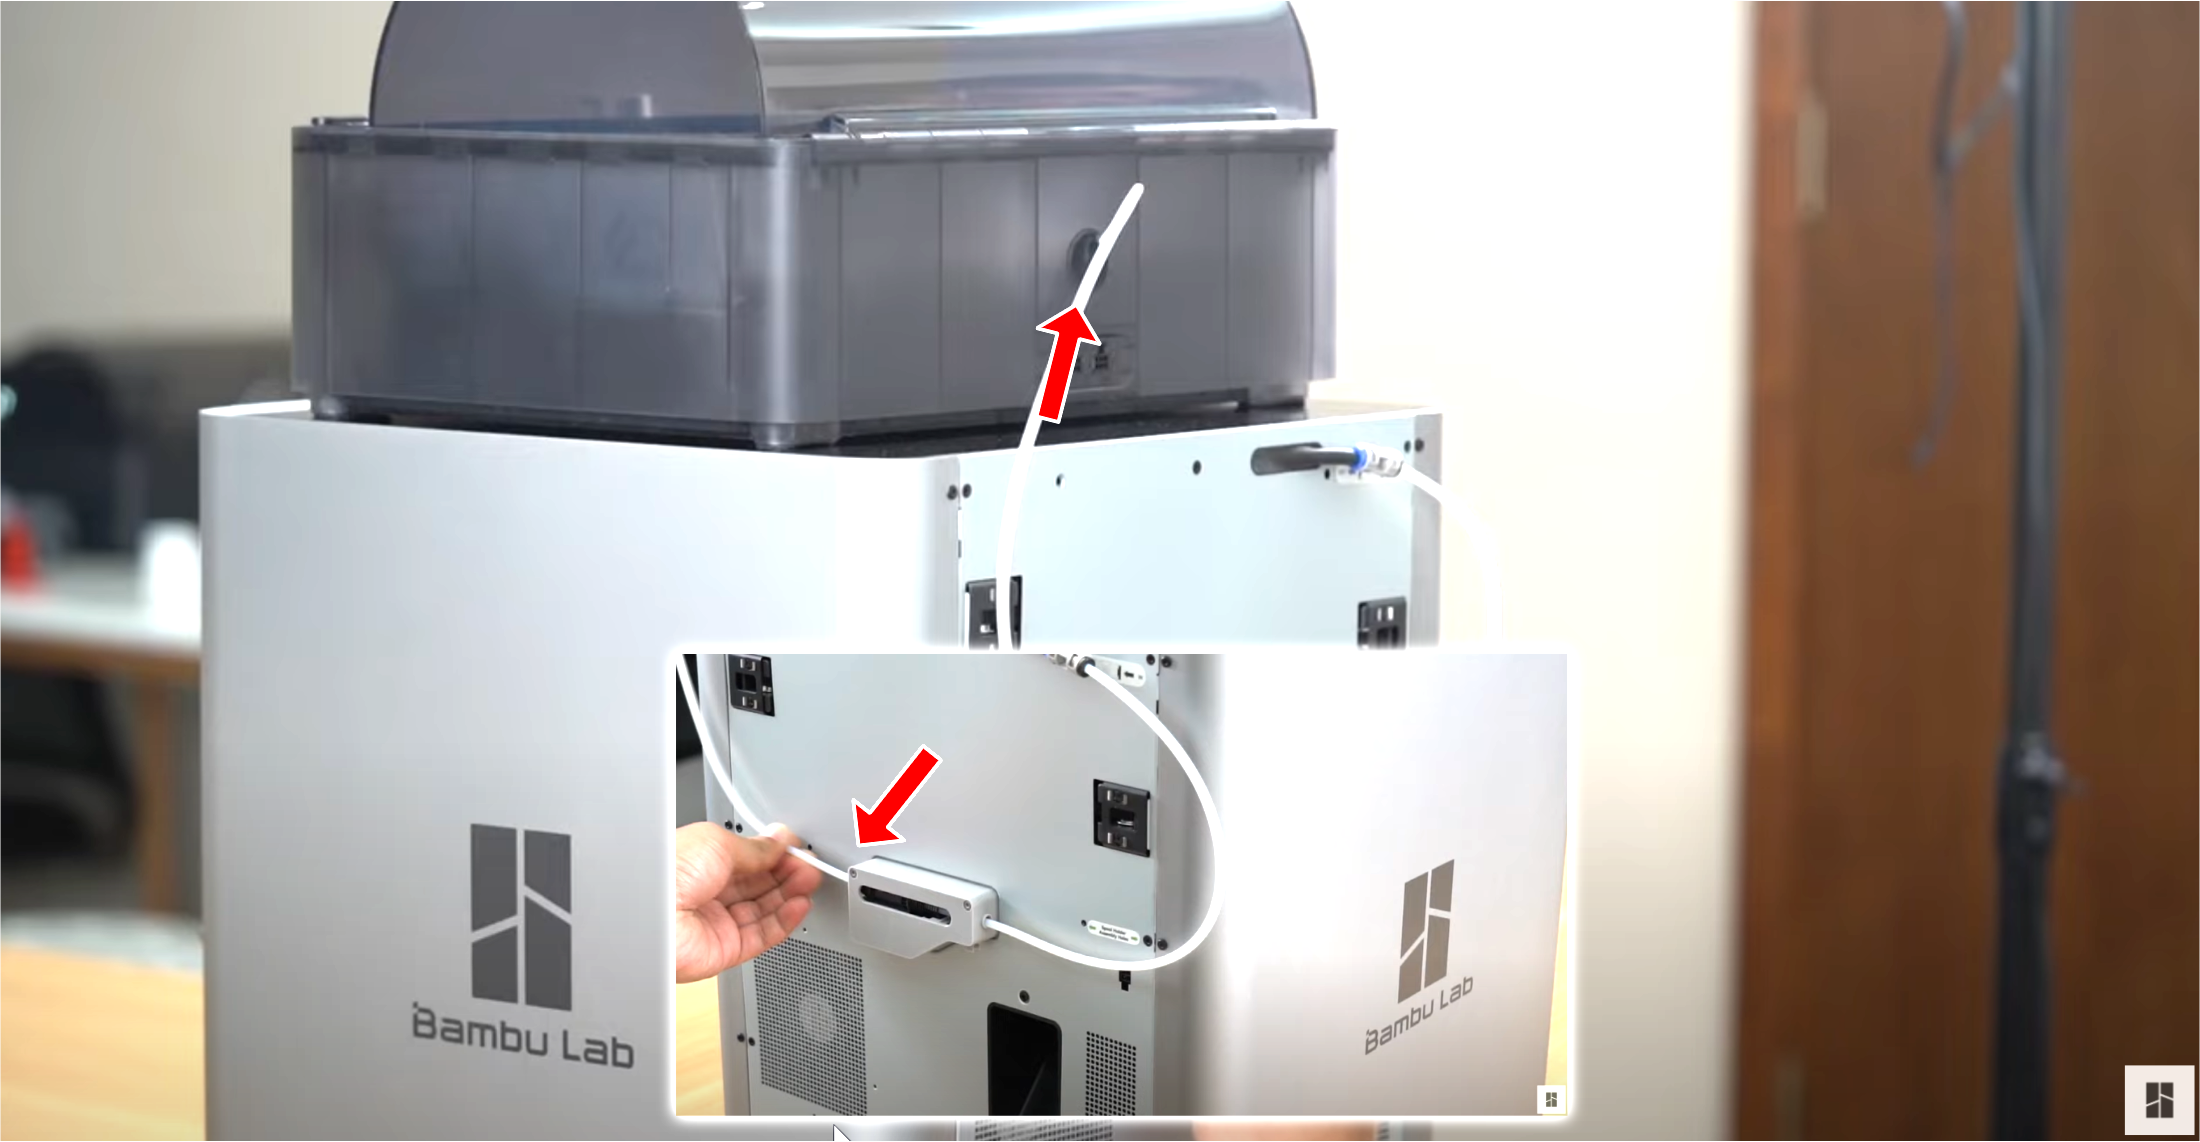
Take the PTFE tube which is already connected to the AMS unit, and connect it to the left side of the filament buffer. |
 |
|
Connect the four-pin cable to the connector located at the bottom of the filament buffer, then proceed to connect it to the printer as shown below. |
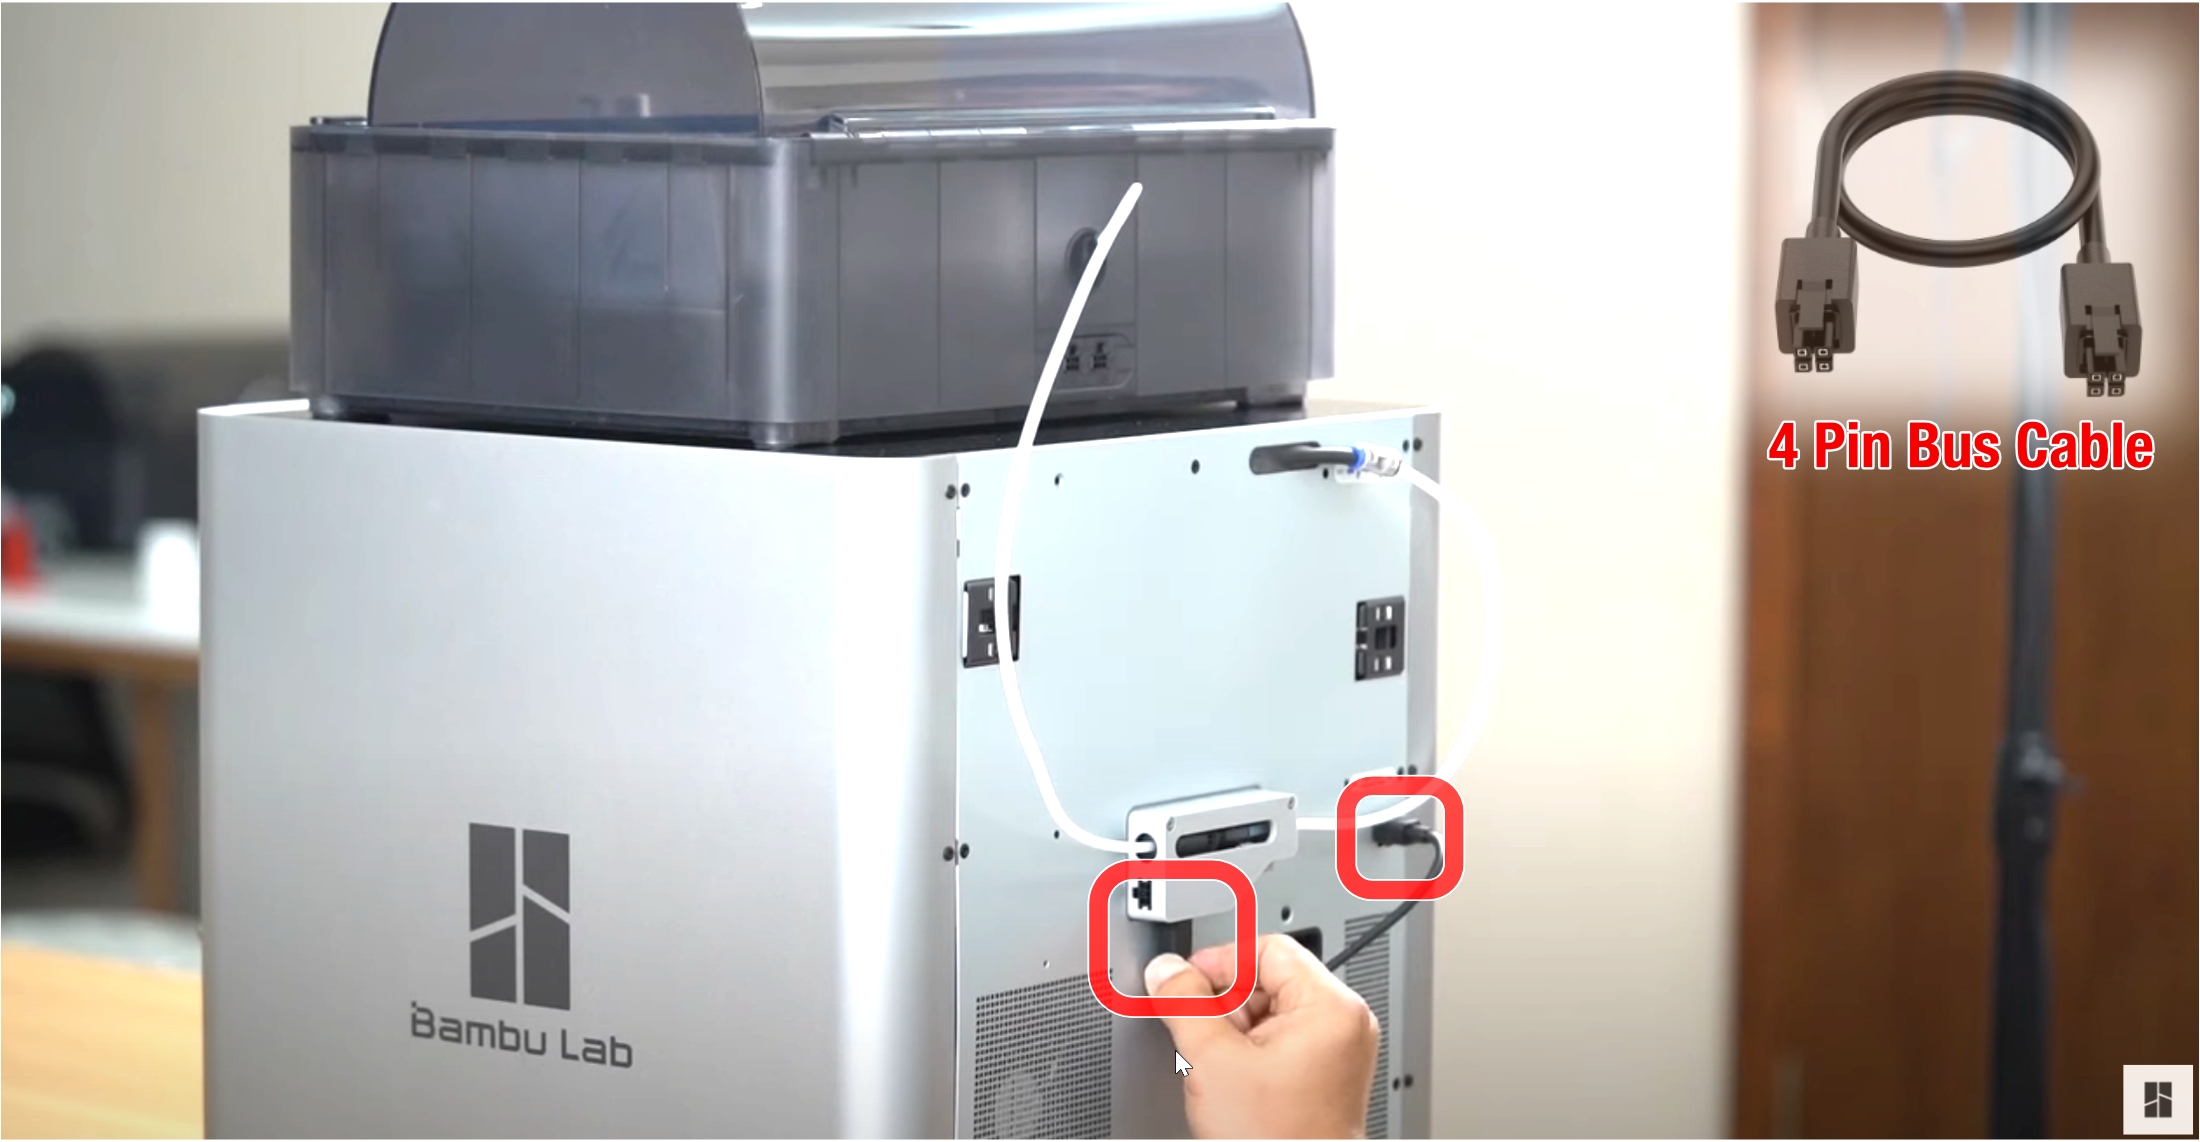 Note: Do not insert the 4-pin cable in the wrong direction. If you are using an L-shaped plug cable, pay attention to the text prompts on it. If you insert the 4-pin cable in the wrong direction, it may cause the printer and AMS mainboard to burn down. 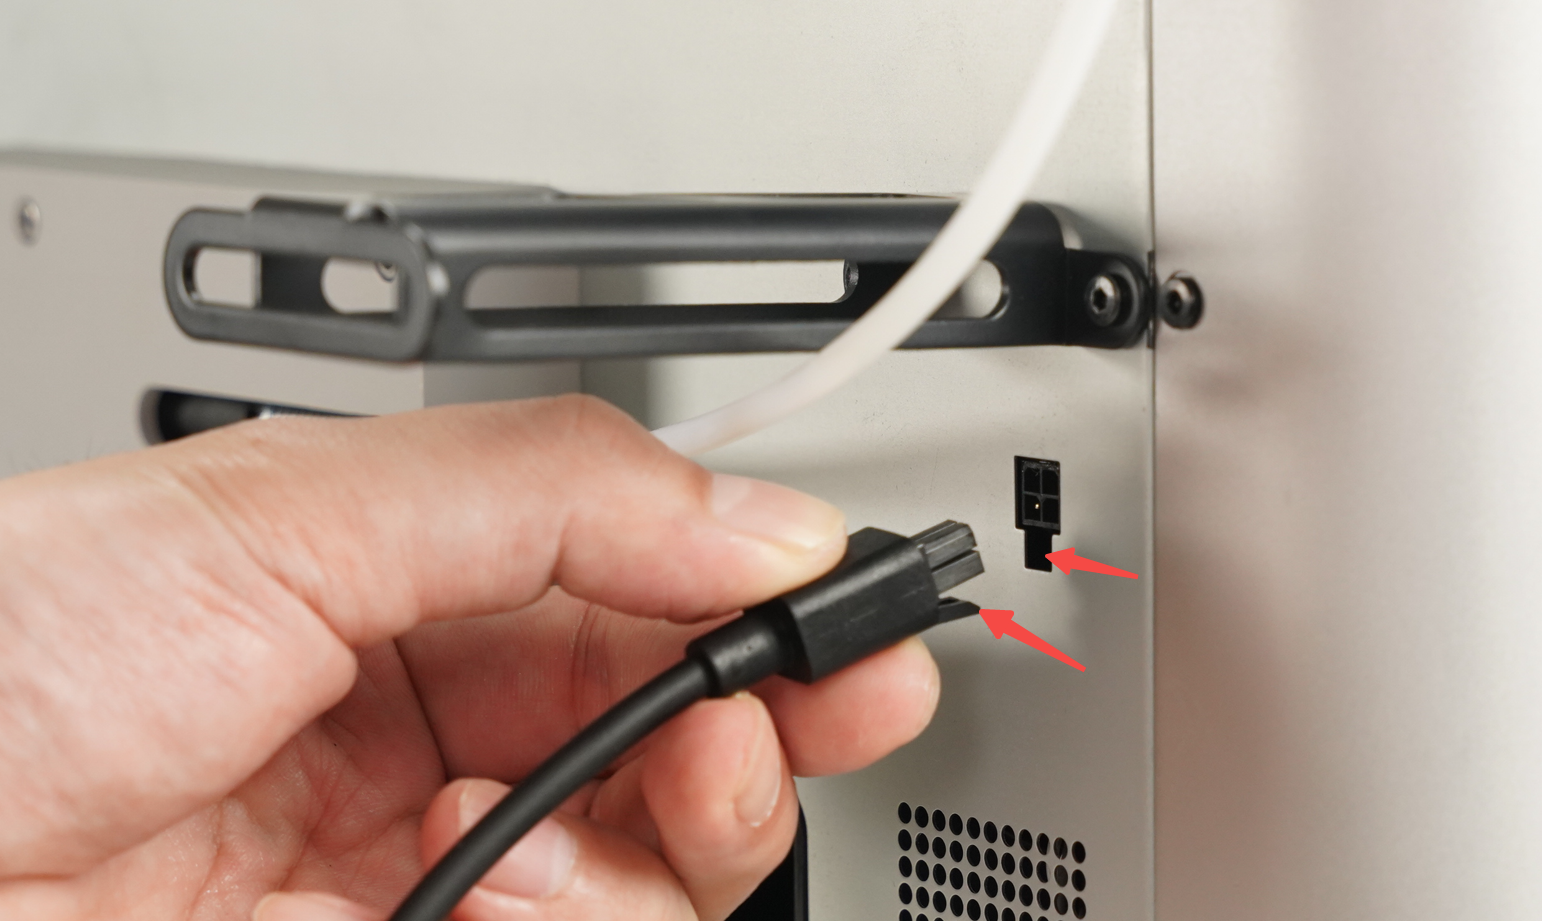
|
 |
|
|
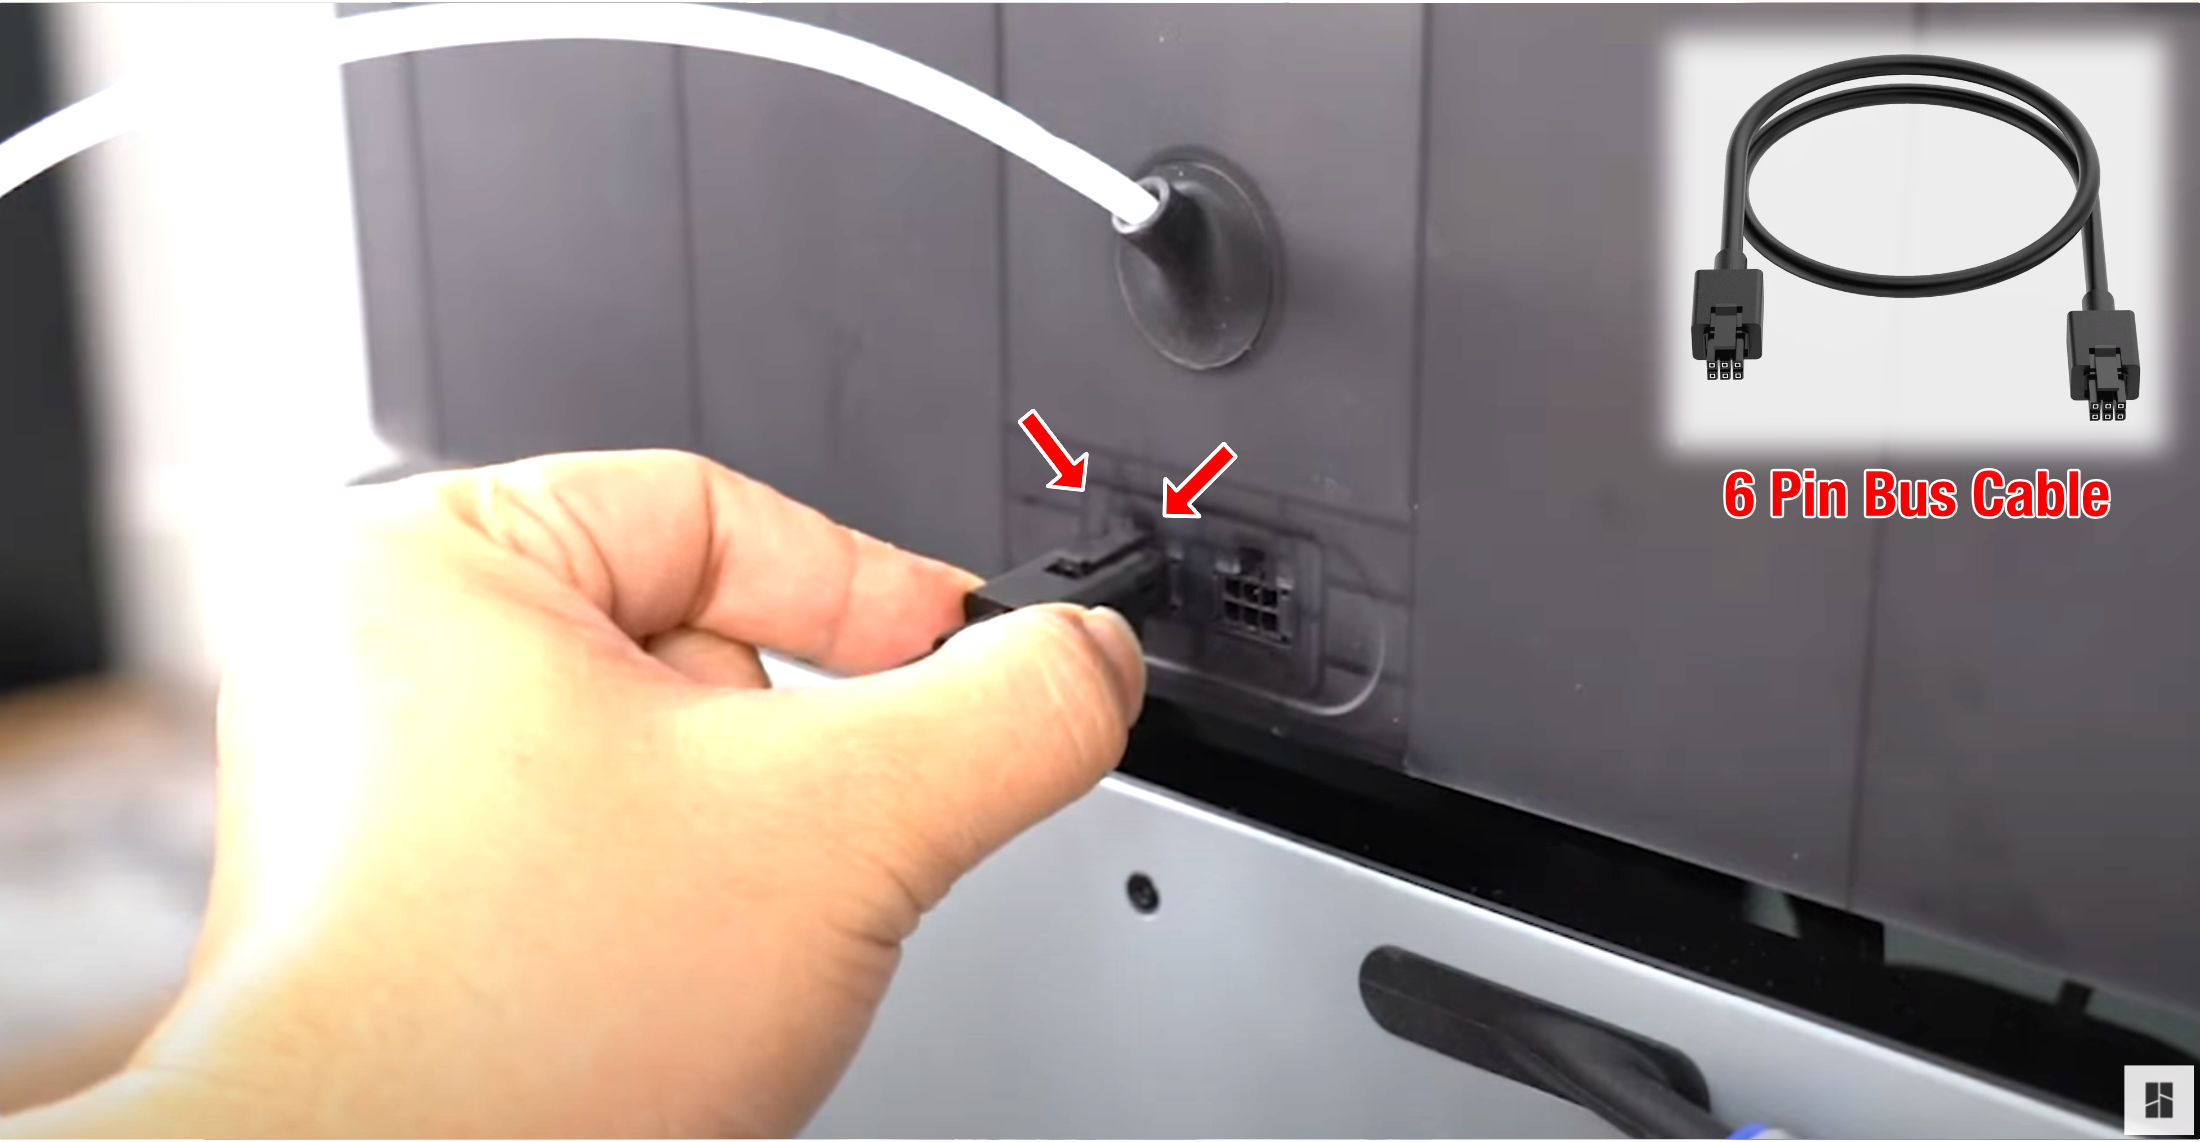
Connect the six-pin cable to the first connector on the AMS, and the other side needs to be connected to the connector located on the left side of the filament buffer. |
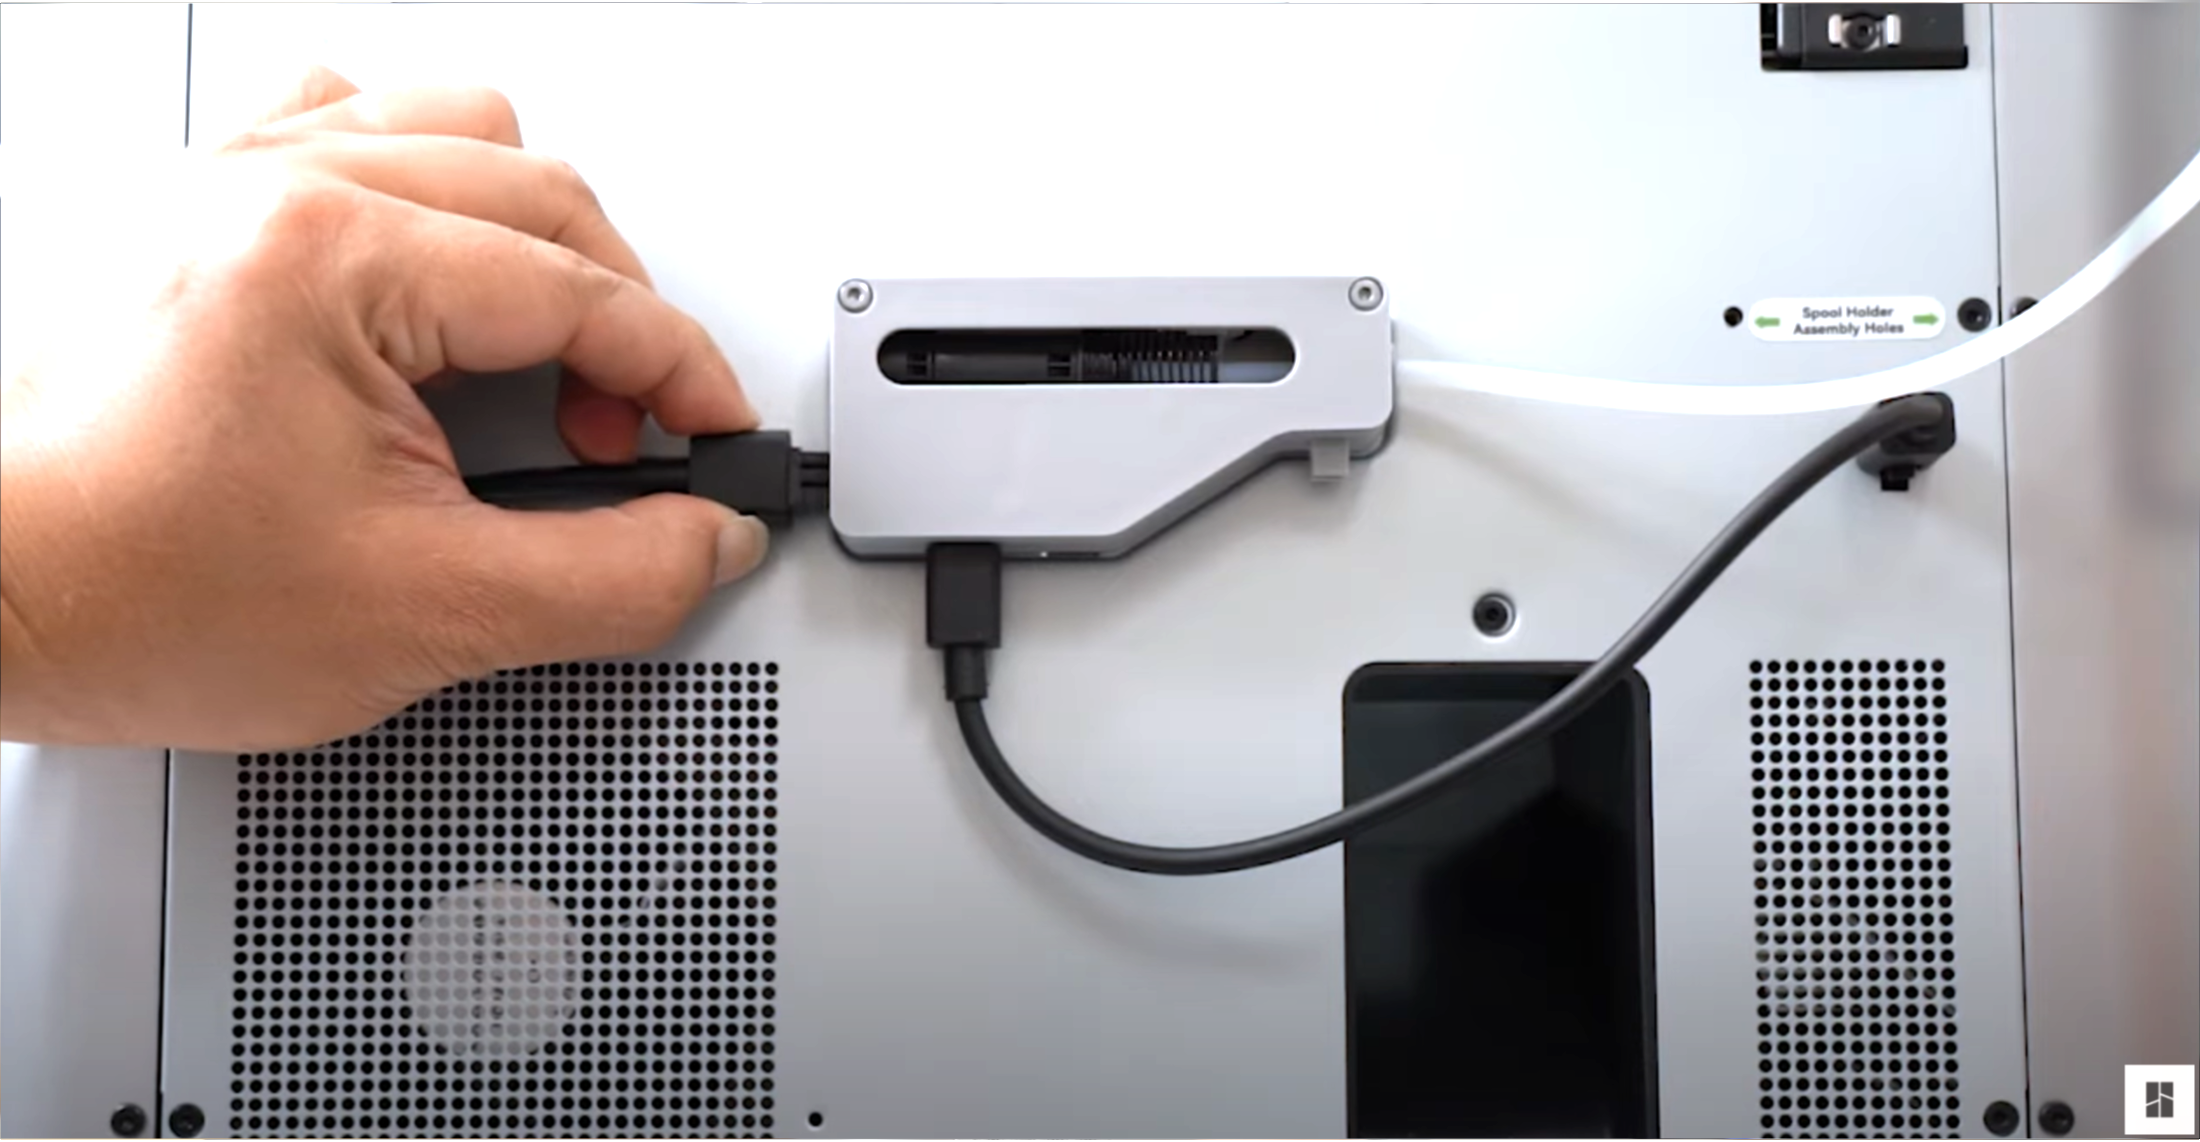
If the spool holder is installed, place the PTEF tube under the holder to reduce resistance of loading/unloading |


